一、安装 Python 3.6
首先,要安装好 Python 3.6。如果你还没有安装,可以参考咪博士之前的教程
Python 3.6.3 官网 下载 安装 测试 入门教程 (windows)
二、官网 下载 安装 PyCharm 2017
1. 选择适合的版本
PyCharm 主要有3个版本:专业版(professional)、社区版(community),以及教育版(education)
- 专业版不是免费的,只有30天的免费试用
- 社区版是免费的
- 教育版主要提供给老师和学生使用,方便教学
由于社区版和专业版的主要功能都是一样的,而且还是免费的,通常,我们选择社区版就可以了,本教程后续的安装步骤也都以社区版为例。
如果,你想进一步了解 PyCharm 不同版间的差异,或者对专业版特别感兴趣,可以参考咪博士另一篇专门的教程
PyCharm 2017 免费 破解 注册 激活 教程(附 License Server 地址)(Python 编辑器 IDE 推荐)
2. 下载 PyCharm 2017 安装包
可以直接上 PyCharm 的官网下载相应版本的安装包
https://www.jetbrains.com/pycharm/download/section=windows
如果官网打不开,或者下载速度太慢的话,也可以到国内镜像,下载最新的安装包
https://pan.baidu.com/s/1eRX55Do
这里,本教程我们选择下载社区版:pycharm-community
3. 安装 PyCharm 2017
双击下载好的 PyCharm 安装包,启动安装程序
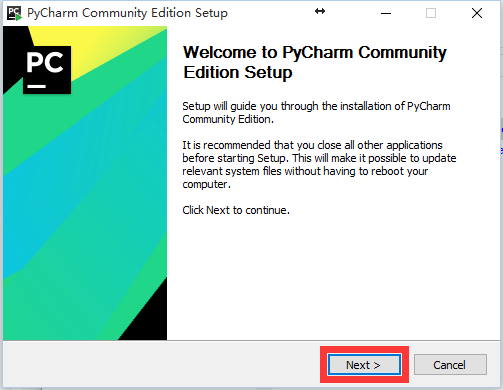
点击 Next,进入下一步
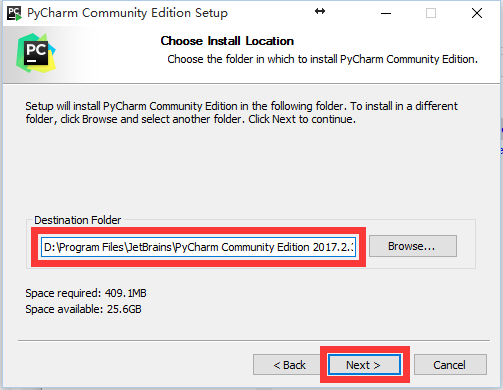
更改安装路径。通常,我们不希望把所有软件都装在 C 盘。
这里我们把默认安装路径的 C: 替换成 D: 将 PyCharm 安装到 D 盘。
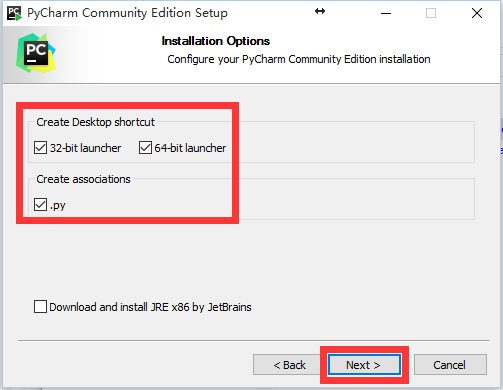
勾选 Create Desktop shortcut (创建桌面快捷方式) 和 Create associations (关联 Python 源代码文件)
点击 Next,继续下一步
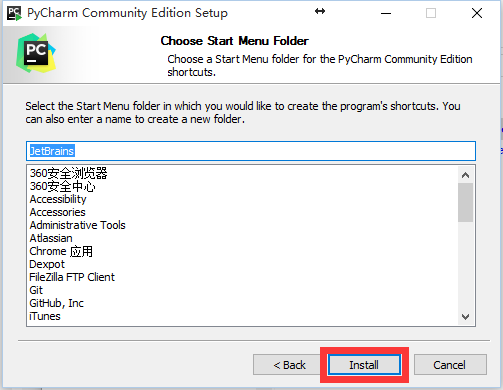
点击 Install,开始安装
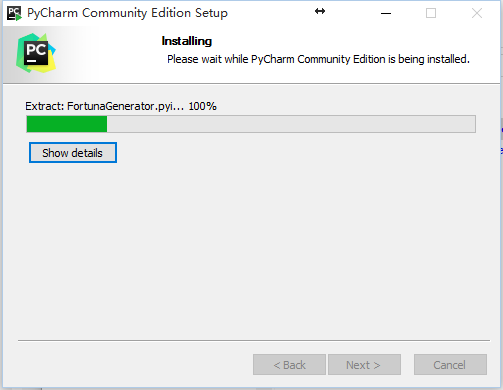
安装中……
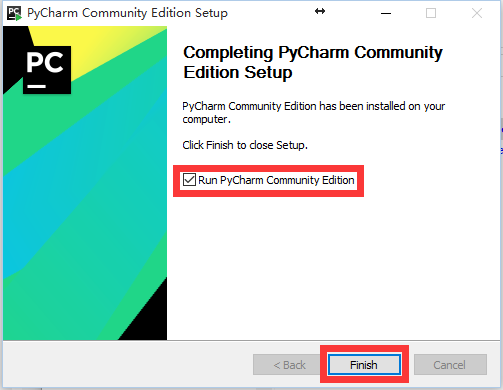
勾选 Run PyCharm Community Edition (在完成安装后启动 PyCharm)
点击 Finish 完成安装并启动 PyCharm
三、新建项目 & 执行代码
1. 初次使用 PyCharm
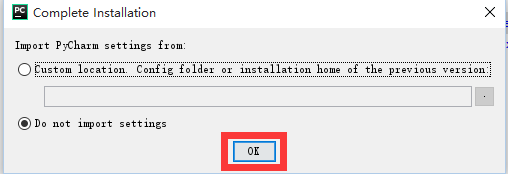
第一次打开 PyCharm,它会询问我们是否要导入先前的设置(默认不导入)
因为我们是全新安装,所以这里直接点击 OK 就可以了
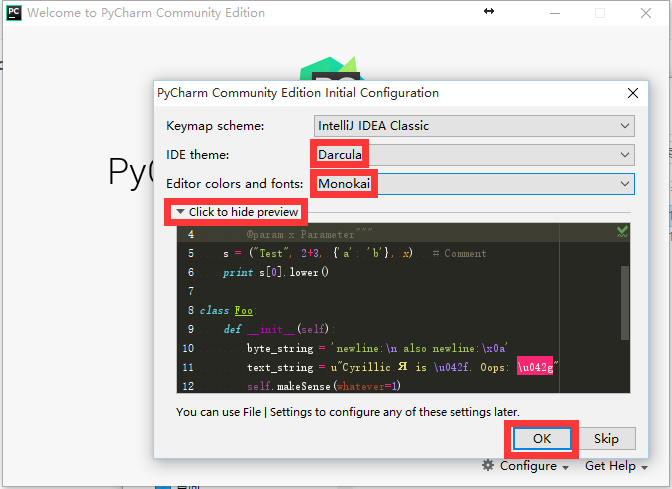
接着 PyCharm 会让我们设置主题和代码编辑器的样式
主题 (IDE theme) 推荐 Darcula,黑色护眼
代码编辑器样式 (Editor colors and fonts) 推荐 Monokai,颜色比较鲜亮,配合 Darcula 的主题,很舒服
点击 OK,完成设置
点击 Yes 重启 PyCharm(由于,我们更改了 PyCharm 的主题,所以需要重启 1次)
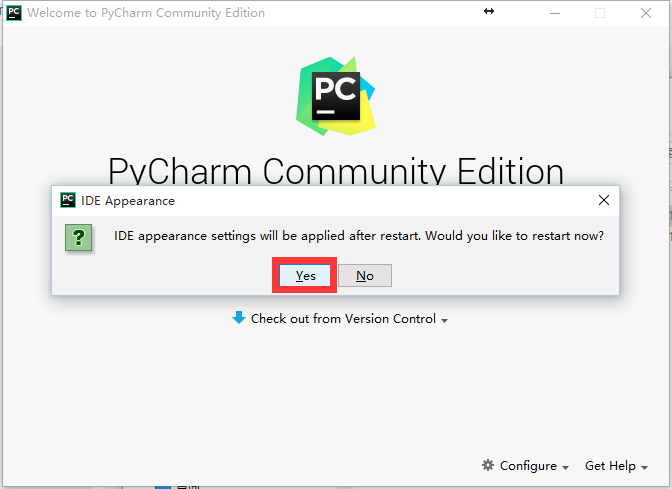
如果手贱不小心错过了(或点错了)上面的主题和编辑器样式设置,不必太担心,后面随时还可以修改的,具体请参考本教程末尾的:四、PyCharm 常用设置(主题、样式、字体、字号)
2. 新建项目
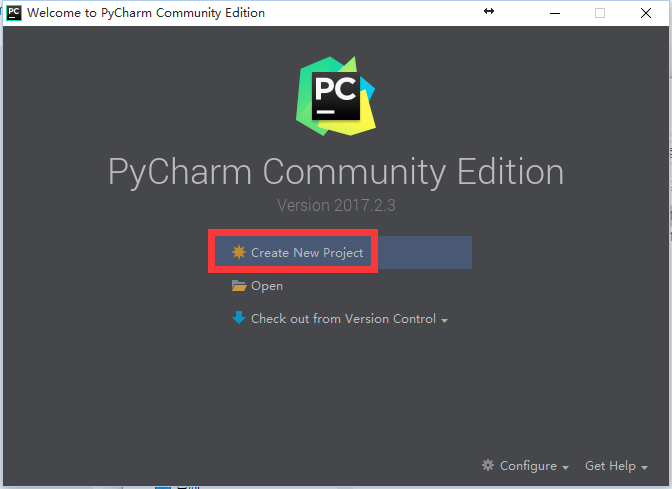
再次启动 PyCharm 后,点击 Create New Project,新建项目
在 Location 一栏输入项目的路径
另外,要注意 Interpreter 一栏默认应该指向 Python 解释器,
如果 Interpreter 一栏是空的,那就代表 Python 没有安装正确,请参考文章开头: 一、安装 Python 3.6
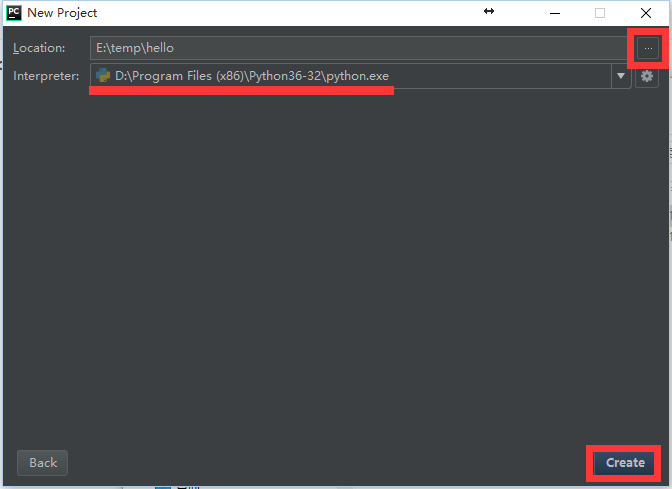
点击 Create 创建项目
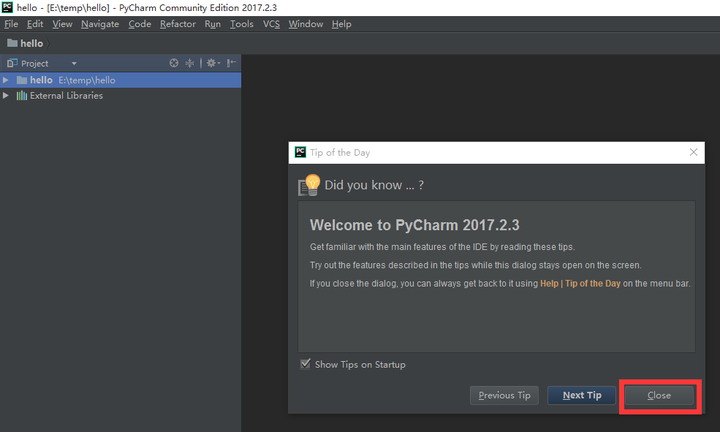
点击 Close,关闭 Tips 窗口(Tips 用来展示 PyCharm 使用的各种小技巧)
3. 新建 Python 源代码文件
点击菜单 File => New,新建文件
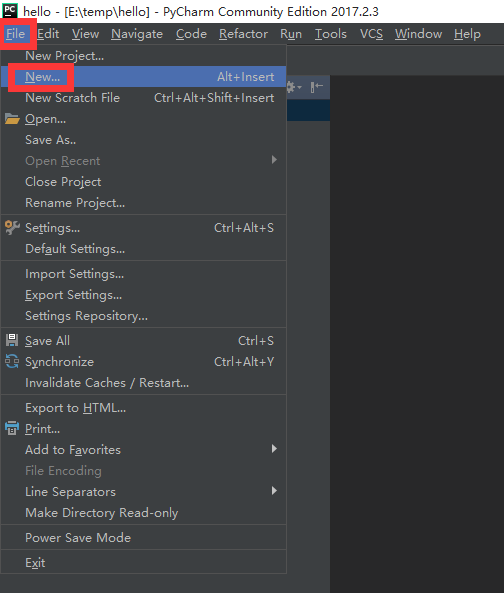
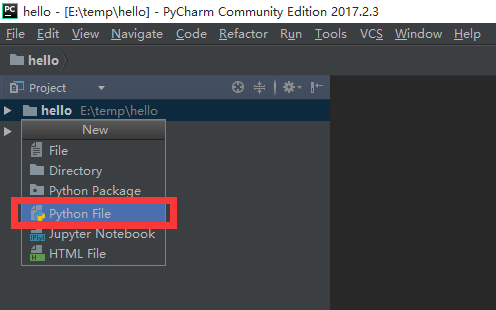
选择 Python File,新建 Python 源代码文件
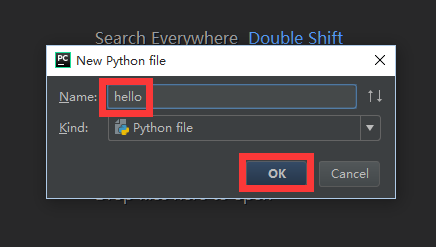
输入文件名 hello(PyCharm 会自动添加后缀 .py),点击 OK,创建文件
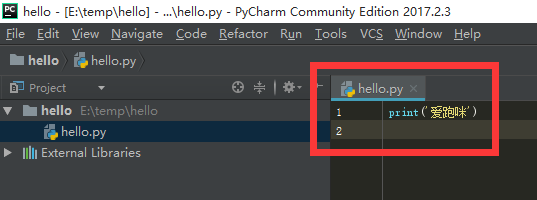
在代码编辑器中输入简单的测试代码
1
print(爱跑咪)
4. 运行程序
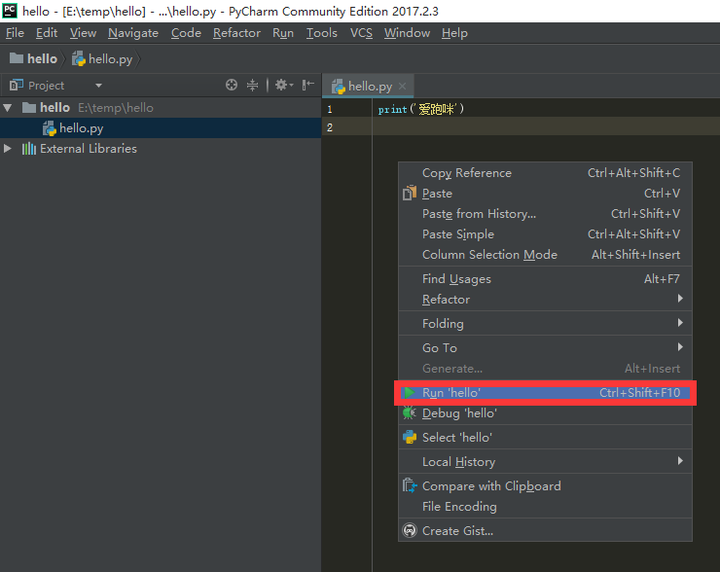
在代码编辑器中,点击鼠标右键,在弹出的的菜单中,点击 Run hello,运行程序
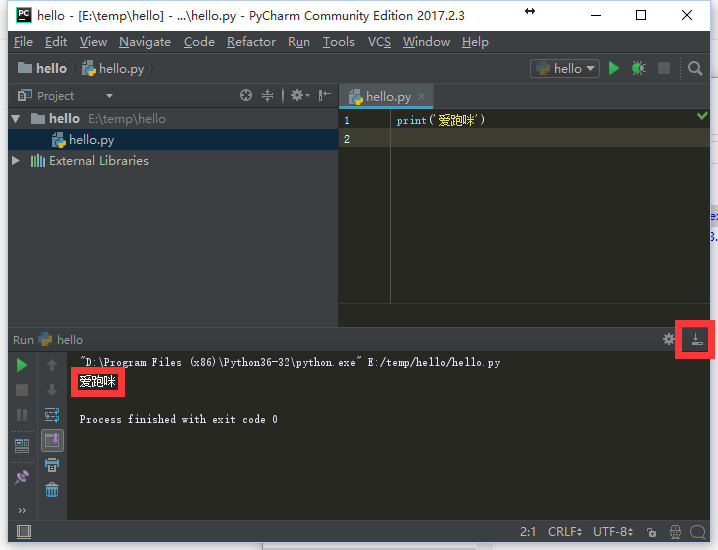
PyCharm 底部自动弹出 console 窗口,可以看到程序执行的结果(输出字符串:爱跑咪)
四、PyCharm 常用设置(主题、样式、字体、字号)
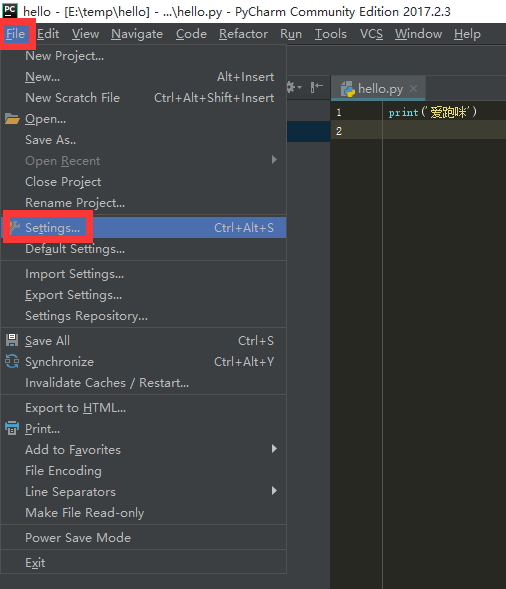
点击菜单 File => Settings,打开 PyCharm 设置对话框
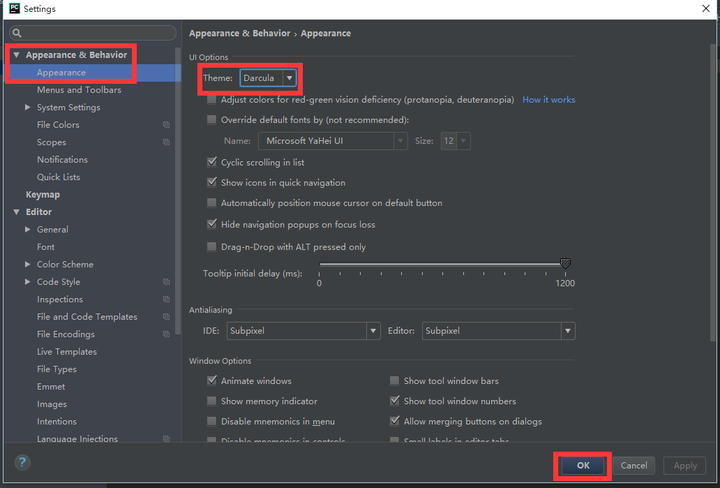
点击 Appearance & Behavior => Appearance,设置 IDE 主题 (Theme),推荐 Darcula
(如果 PyCharm 安装完成后,第一次启动时错过了设置,可以在这里做)
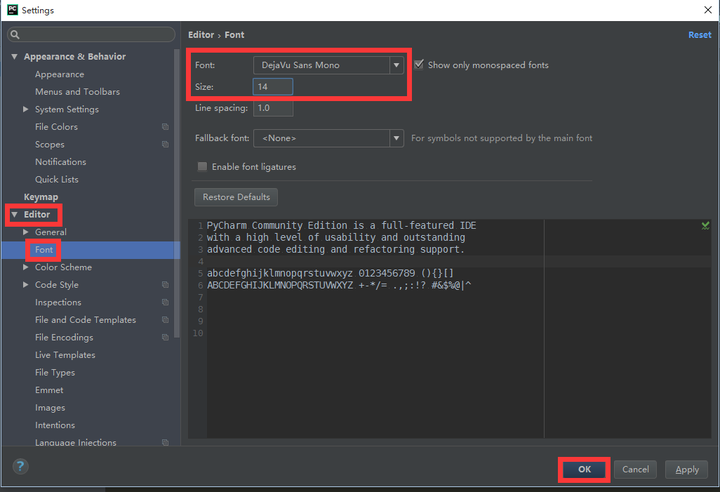
点击 Editor => Font 设置代码编辑器的字体和字号
字体 (Font) 推荐使用 DejaVu Sans Mono,真心漂亮
字号 (Size) 推荐设置为 14,默认的 12 偏小,看久了辣眼睛
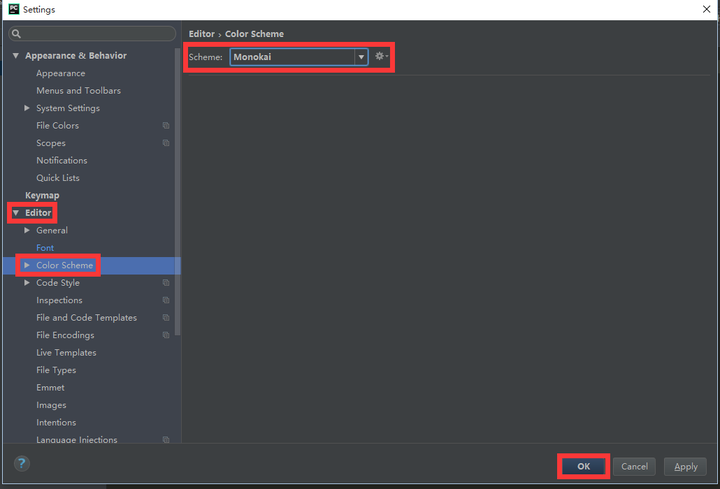
点击 Editor => Color Scheme 设置代码编辑器样式 (Color Scheme),推荐 Monokai
(如果 PyCharm 安装完成后,第一次启动时错过了设置,可以在这里做)
最后,点击 OK 保存设置
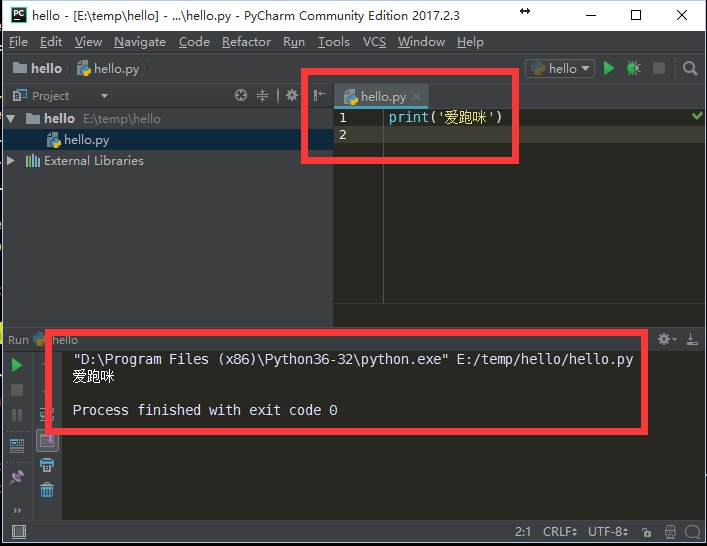
再次运行程序( 按快捷键 Ctrl+Shift+F10),
再来看看现在代码编辑器和控制台输出的效果,是不是感觉舒服多了呢?
【原文链接】http://www.ipaomi.com/2017/10/13/pycharm-2017-官网-下载-安装-设置-配置-主题-字体-字号-使用-入/
评论0